
Have you been thinking of starting a blog for forever but just can’t ever figure out where to start?
Do you day dream about what it would be like to be your own boss? Pick your own working hours? Have the freedom to travel the world if you desire?
Would you want to be able to turn blogging into a full time job?
How to Create Your Own Travel Blog
If yes, you definitely should start your own blog. I was not tech savvy when I started my blog (still not good on a computer). My lack of computer skills required me to ask my husband how to change the background on my computer (yes, this literally happened). Web development software is now designed for people like me; now a days it makes things a million times easier, and a million times cheaper.
Starting a blog turned out to be one of the best decisions I ever made. To be honest, when I first started I never believed I would have success with it. It was just a way for me to get through one of the most difficult times in my life.
When I started my blog I was very sick and had been bedridden for two years! I was miserable. I quickly came down with this life sucking illness that made it hard to get through the day. I wanted to start a blog for a while, but felt I did not have the health or abilities to actually do it. I mean, I couldn’t even sit up!! How was I going to have a successful blog?! After a full year of telling myself I was too sick to start, I decided to stop making excuses and just do it.
And I am so glad I did!
I think the reason so many people hesitate when starting a blog is because there are so many myths floating around. Some of the biggest myths I encountered are that running a blog is too expensive, maintaining a website requires technical expertise, the blogging industry is too saturated, and it is impossible to make your content stand out. These are all myths!!! These myths can be so discouraging for a new blogger, and prevent many people from even trying.
With me being stuck in bed 24 hours a day, I had a ton of time to research (an actual advantage of my illness). There really are a number of great tools out there, but this post will walk you through some of the basics, and recommend products to get you started. Even though I make commission on some of my recommendations, the recommendations in this post are all things I use!
So I am here to tell you…
Don’t believe what you hear online! You can be successful blogging today.
Within 6 months of starting my travel blog, I was getting 170,000 page views a month, and already making money every month! In the next 2 months after that my blog hit over 1 million page views. I honestly couldn’t believe it. Everything I read online said it would take me years to build any sort of following and make money. Most of the bloggers I talked to worked 80 hours a week and posted every day. I knew this type of commitment was not possible for me, so I never thought I would have success.
As my first year of blogging ended I reached over 1.3 million people, and that was all while taking long breaks from posting due to my poor health (I went 6 months and only put up 2 posts).
Don’t let people discourage you from starting a blog. You CAN be successful, and it is not too late to start.
So let’s do this together!
A step by step guide to walk you through how to create your own travel blog.
Overview
There are four main steps to starting a blog (don’t worry, I will explain what each of these things mean):
- Hosting and Domain Name (URL)
- Installing WordPress
- Picking a blog theme and making it look good
- Posting and writing your content
1. Hosting and Domain Name
Start with Bluehost
Confused already? Worry not, I had no clue what hosting service to use when I first started out! A hosting service is a company that will actually house and keep your website connected to the web 24 hours a day. They do this by giving you space in one of their servers, and keep those servers permanently plugged in to the web (if you tried to do this at home it would be ridiculously expensive and require a lot of technical know-how).
There are a lot of hosting services out there; after A LOT of research and a trusty recommendations, I decided to go with Bluehost for a few reasons.
1. They are really inexpensive
They are very cheap ($3.95/month) and I figured that even if my blog never took off, I wouldn’t be out that much money.
2. 100% Risk Free
It can be terrifying to spend money on something that you are not sure you will stick with. I know the feeling. I have been there! Thankfully Bluehost offers a money back guarantee if you decide to cancel later on. This made me feel so much better about taking that first step.
Let’s get started!
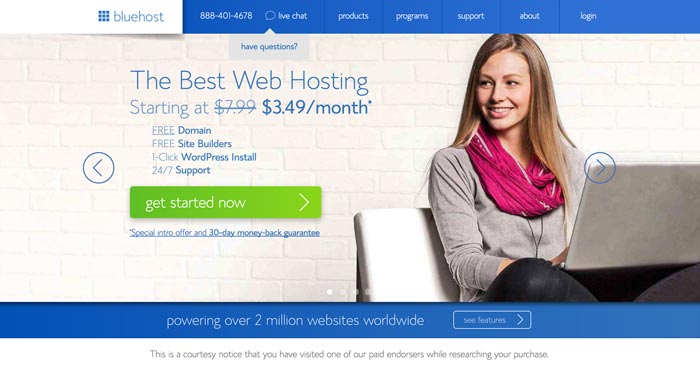
1. Navigate to Bluehost.com and click the big green “Get Started Now” button.
2. Select your plan
Next you will select your plan. I would start with the $3.95 plan, as you can always upgrade later if needed. Most of the extra features are not needed for a new blog, and when they are needed, it is extremely easy to upgrade.

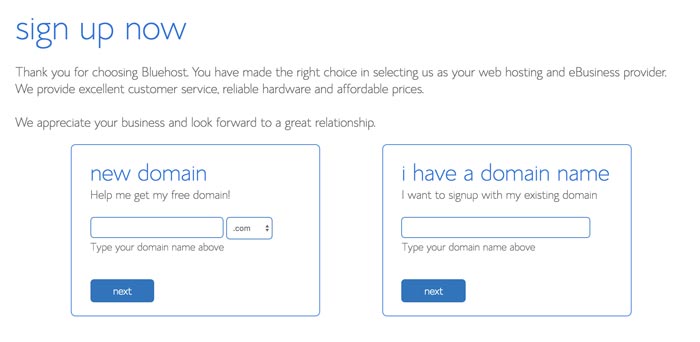
3. Register Your Domain Name
The next step is to register your domain, or to choose your actual website address. For example, www.avenlylanetravel.com is my domain name. Enter you domain name in the “new domain” box and click “next”.
**You get a free domain name when signing up with bluehost. Another bonus!
If you’ve already registered a domain name, you can enter it on the right.
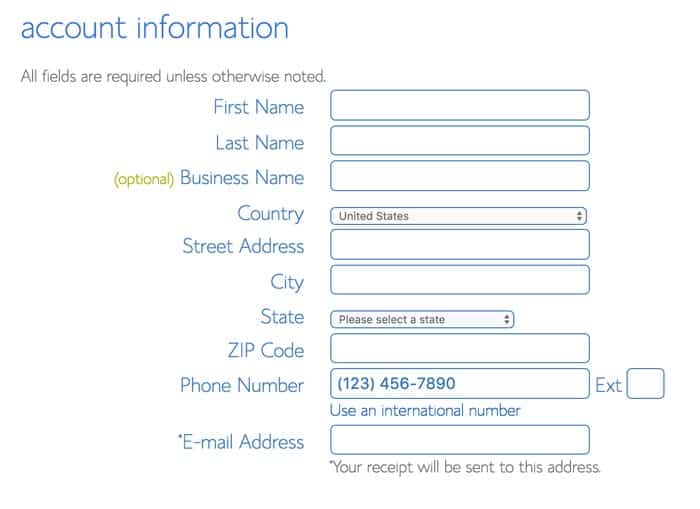
3) Enter all of your account and contact information.
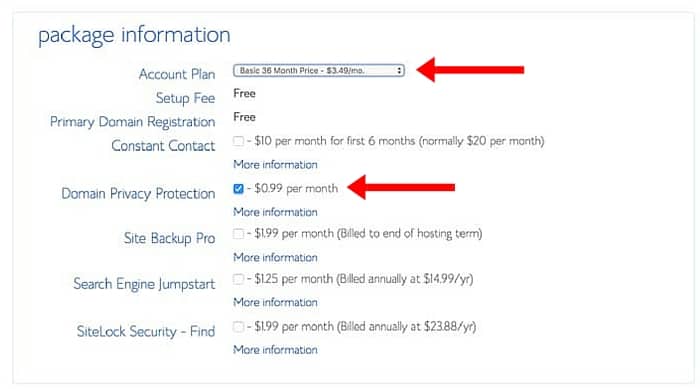
4. Continue down to the “package information” section.
You get the cheapest monthly rate by selecting 36 months, which requires you to pay for 3 years up front. When I signed up, I did not know I would be charged the full 3 years, and was shocked to see the total sum taken out of my account. Don’t let this stress you out or hold you back though. Bluehost has a money back guarantee if you change your mind. You wont be locked into a three year contract!
If the upfront cost is too much, you can always consider pre-paying for the 12 month plan instead ($6.95 a month instead of $3.95). It will be a little more expensive month to month but not much.
Don’t get caught up in all the extras; they really are not necessary, especially as a beginning blogger. The only one I do recommend is the Domain Privacy Protection. It is only $9.99 for the entire year. If you don’t add this protection, then people will be able to look up your home address, phone number, etc. via your domain name. Kinda scary!
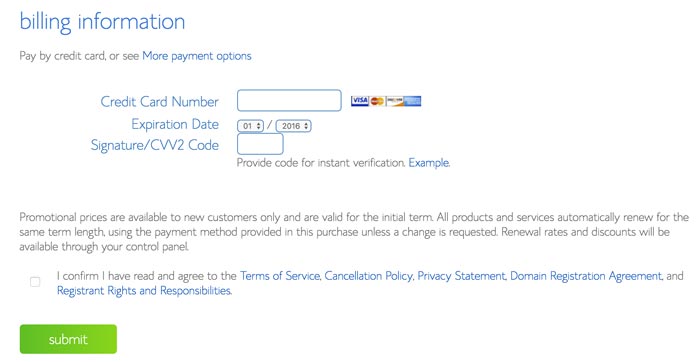
5. Enter in your billing information, agree to the service agreements, and then click “submit” to move to the next step.
Check your email for login info
After you have completed your purchase you will be sent a welcome email from Bluehost. This email will contain all your login information, so be sure to keep this email for future reference.
You now have domain and hosting for your blog. The next step is to install WordPress.
2. Install WordPress
No clue what WordPress is? Once again, do not worry, but be ready for WordPress to become your best friend. Basically, WordPress is the software that makes designing your blog and typing out your posts super quick and intuitive. WordPress makes it so you never need to learn how to code your website, yet can have the benefits of a fully coded website. More than 60 million websites are managed through WordPress, and thankfully it can be installed with one click directly through Bluehost.
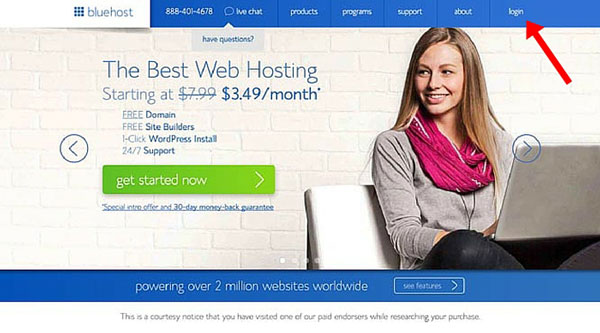
1. Login to your Bluehost cpanel
Go back to Bluehost.com and click the Login button in the top right corner of your screen. Continue to log in using your username and password that were emailed to you.
2. Click on Install wordpress.
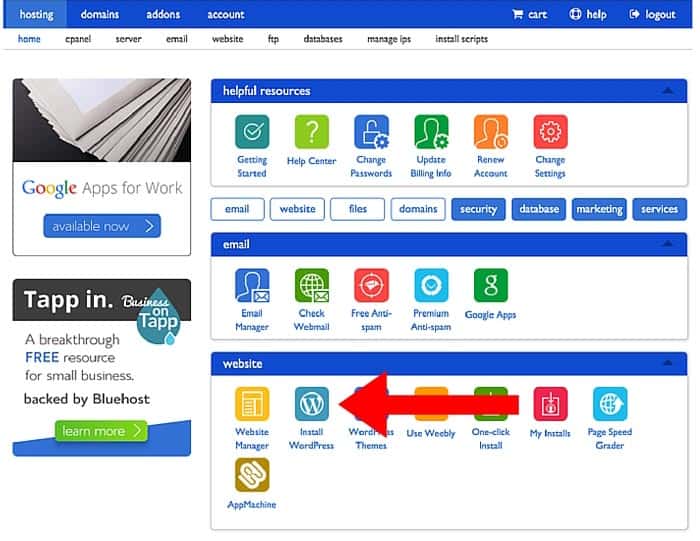
Bluehost has an option to install wordpress with just one click! It makes things so much easier when signing up and you do not have to hire anyone to do this for you.
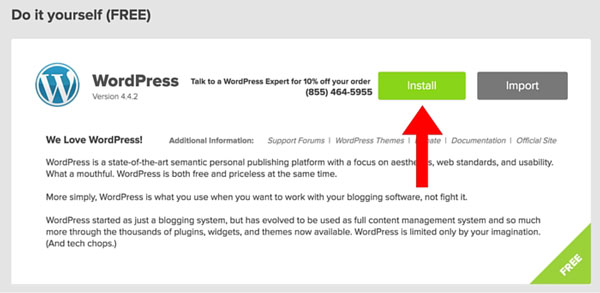
Start the WordPress install
Next you’ll get a window that looks something like this. Click the Install button to begin the WordPress installation process.
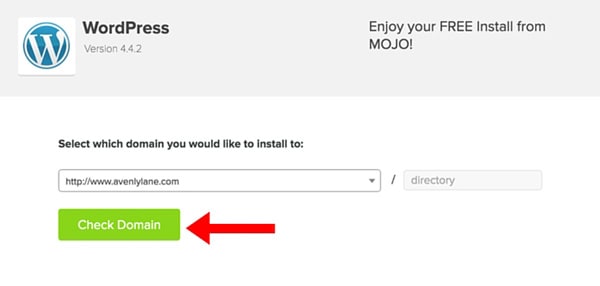
Choose which domain to install WordPress
Choose your domain from the dropdown menu if it’s not already chosen for you. Don’t worry about the directory field. Leave the directory field blank. Click Check Domain.
At this point, you officially have your own travel blog. Yay! Next we need to make it look good.
3. Picking a blog theme and making it look good
A website theme is what determines the actual layout of your site. The theme determines how your posts are displayed, where the actual posts are, where pictures are, where the title goes, every link that is available for people to click on, and what people see when they scroll.
WordPress has THOUSANDS for different themes for you to choose from, some are free, and others are paid for. Each theme has tons of options that can be tweaked as well: colors, fonts, number of columns etc.
You want to find a theme that you like, but also one that allows you to grow. I purposefully chose a theme with LOTS of design options so that I could “redesign” my site if I got sick of its current look. I’ve already made tons of changes as my blog has developed. Even if you do not like the theme you first choose, themes can always be switched later on.
The theme I chose to start is Simplemag by Themeforest.
I currently use the theme 15Zine also by Themeforest. This is another amazing theme that I have been super happy with. Either of these themes would be great to start with. No coding required.
ThemeForest has so many WordPress themes to choose from and they also offer awesome customer service. I used them non-stop when I was first figuring out how to put my theme together.
– ThemeForest is a huge database of premium WordPress themes which I always reference if I’m designing a new site. There are a lot of styles to choose from, so if you’re looking for something with a built-in design right out of the box, this is a good place to start looking (once again remember I’m a girl with no technical computer background or understanding).
If you do not want to pay for a theme, (mine was $50) then no worries at all! WordPress has a ton of free ones you can pick from. You can check some of them out here.
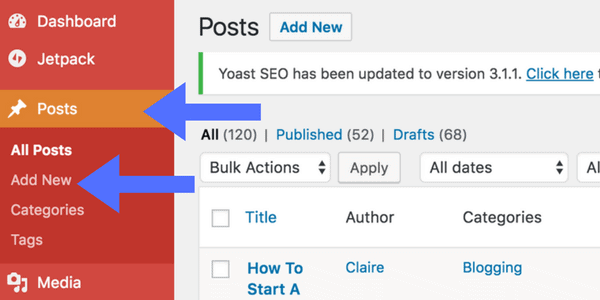
4. Write Posts
The last step is to begin writing posts. You will see how incredibly easy it is within WordPress. Simply login to your WordPress account dashboard and click POSTS and then ADD NEW – a typing box immediately pops up and it is ready for your posts. The typing box operates just like write your post, (also easy to add pictures or hyperlinks) . Once you finish writing, you just click post, and your new post is immediately available on the web. Bam! Finished, no coding necessary!
It really is that easy, and I cannot recommend this process enough. I wish you the best of luck with your new blog!
Oh, and also if you guys are interested to learn more on how I grew my blog you can click the button below to sign up for more tips. As a bonus just for signing up you will also get sent my free “Group Board Cheatsheet“. This will include a list of some of my favorite travel group boards you guys can join that bring me tons of traffic each month. I include board statistics and how I received an invitation to join them. Hope you guys enjoy!

If you guys have any specific questions or comments you can ask them below!
